
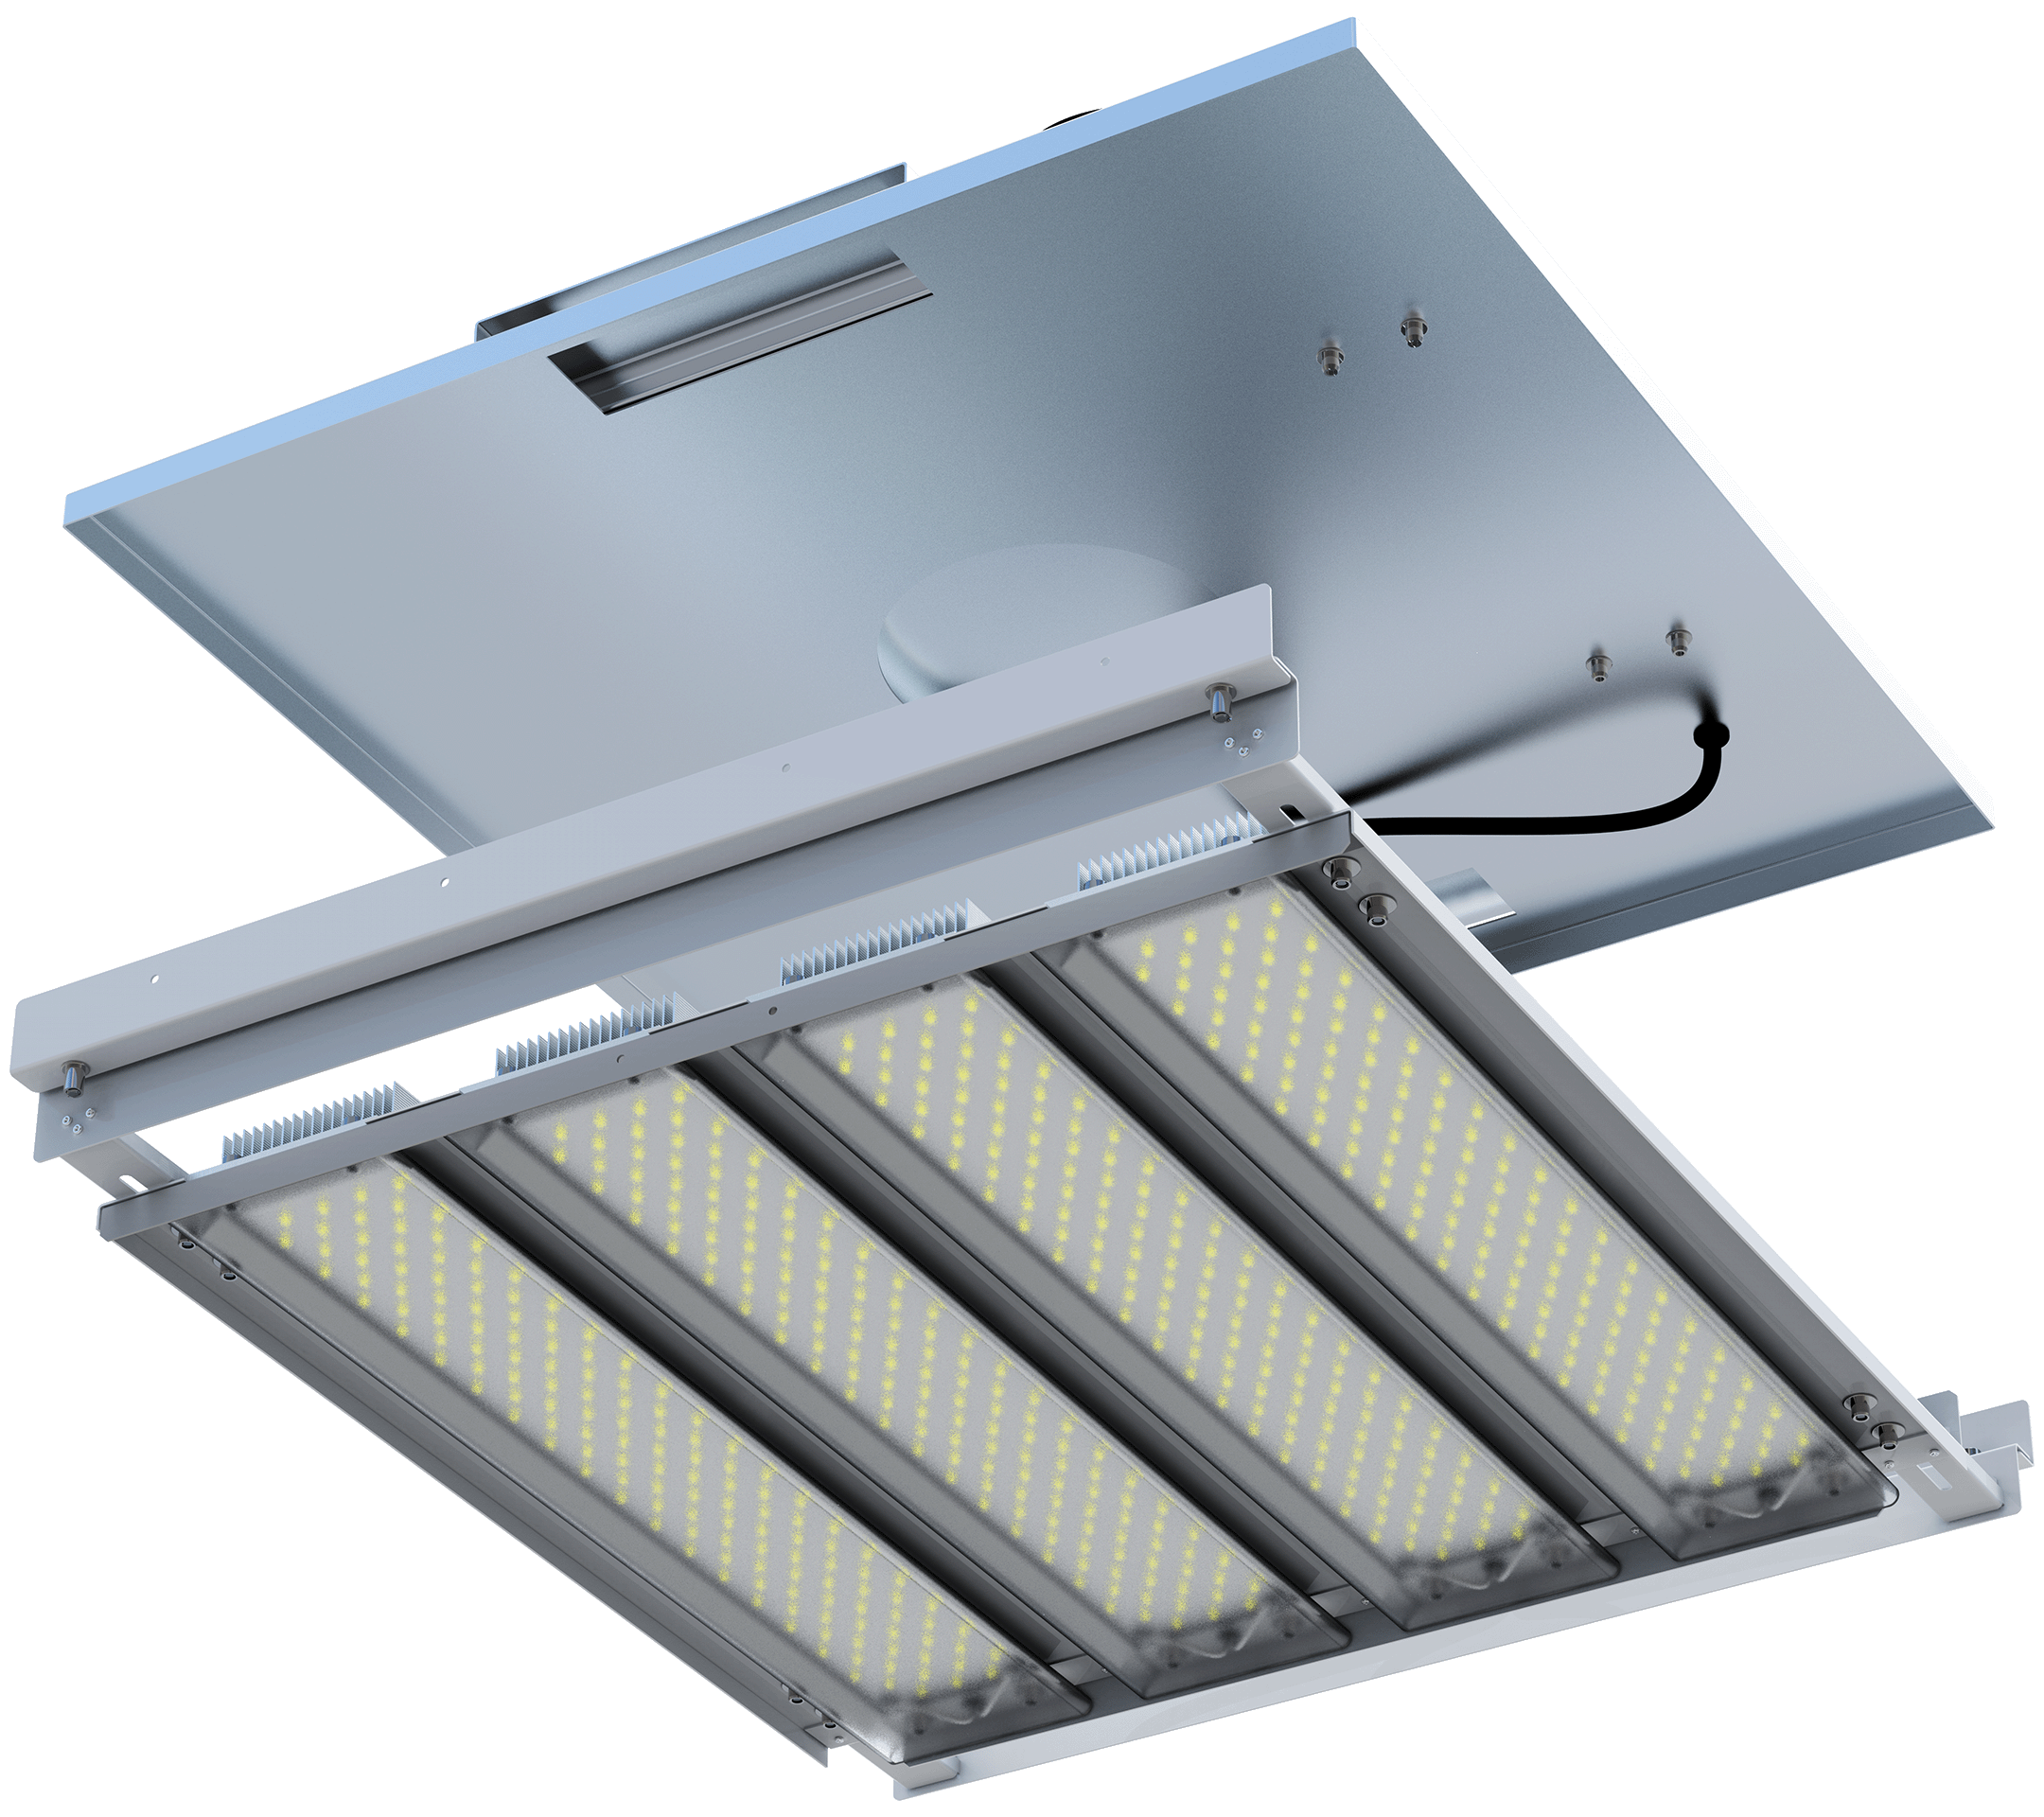
LIGHT PLATE | VB
Smart-Fit LED Upgrade
Light Plate VB is a purpose-designed LED upgrade for existing 200–450 W metal-halide pyramidal-lens luminaires. Now in its third generation, VB retains the original enclosure and lens while replacing the internal light source and control gear with a modern, serviceable LED system.
This preserves the existing luminaire and its established position within the lighting layout while providing a straightforward route to improved efficiency, light quality and long-term maintainability.
L85 >10 Years 24/7
Isollux XE dual-die LED chipsets are conservatively operated to optimise service life and deliver long-term lumen maintenance across the published operating range of the luminaire.
LM-80 / TM-21 (2021)
L80 (B0) >102,000 h @ Ta 50ºC
Power Options
100 W | 17,000 lm
150 W | 25,500 lm
180 W | 30,600 lm
Nominal efficacy: 170 lm/W • 5000 K • CRI 85
*Power options are dependent on the size and configuration specified.
Contact Us for the Full Data Pack

Smart-Fit LED Upgrade
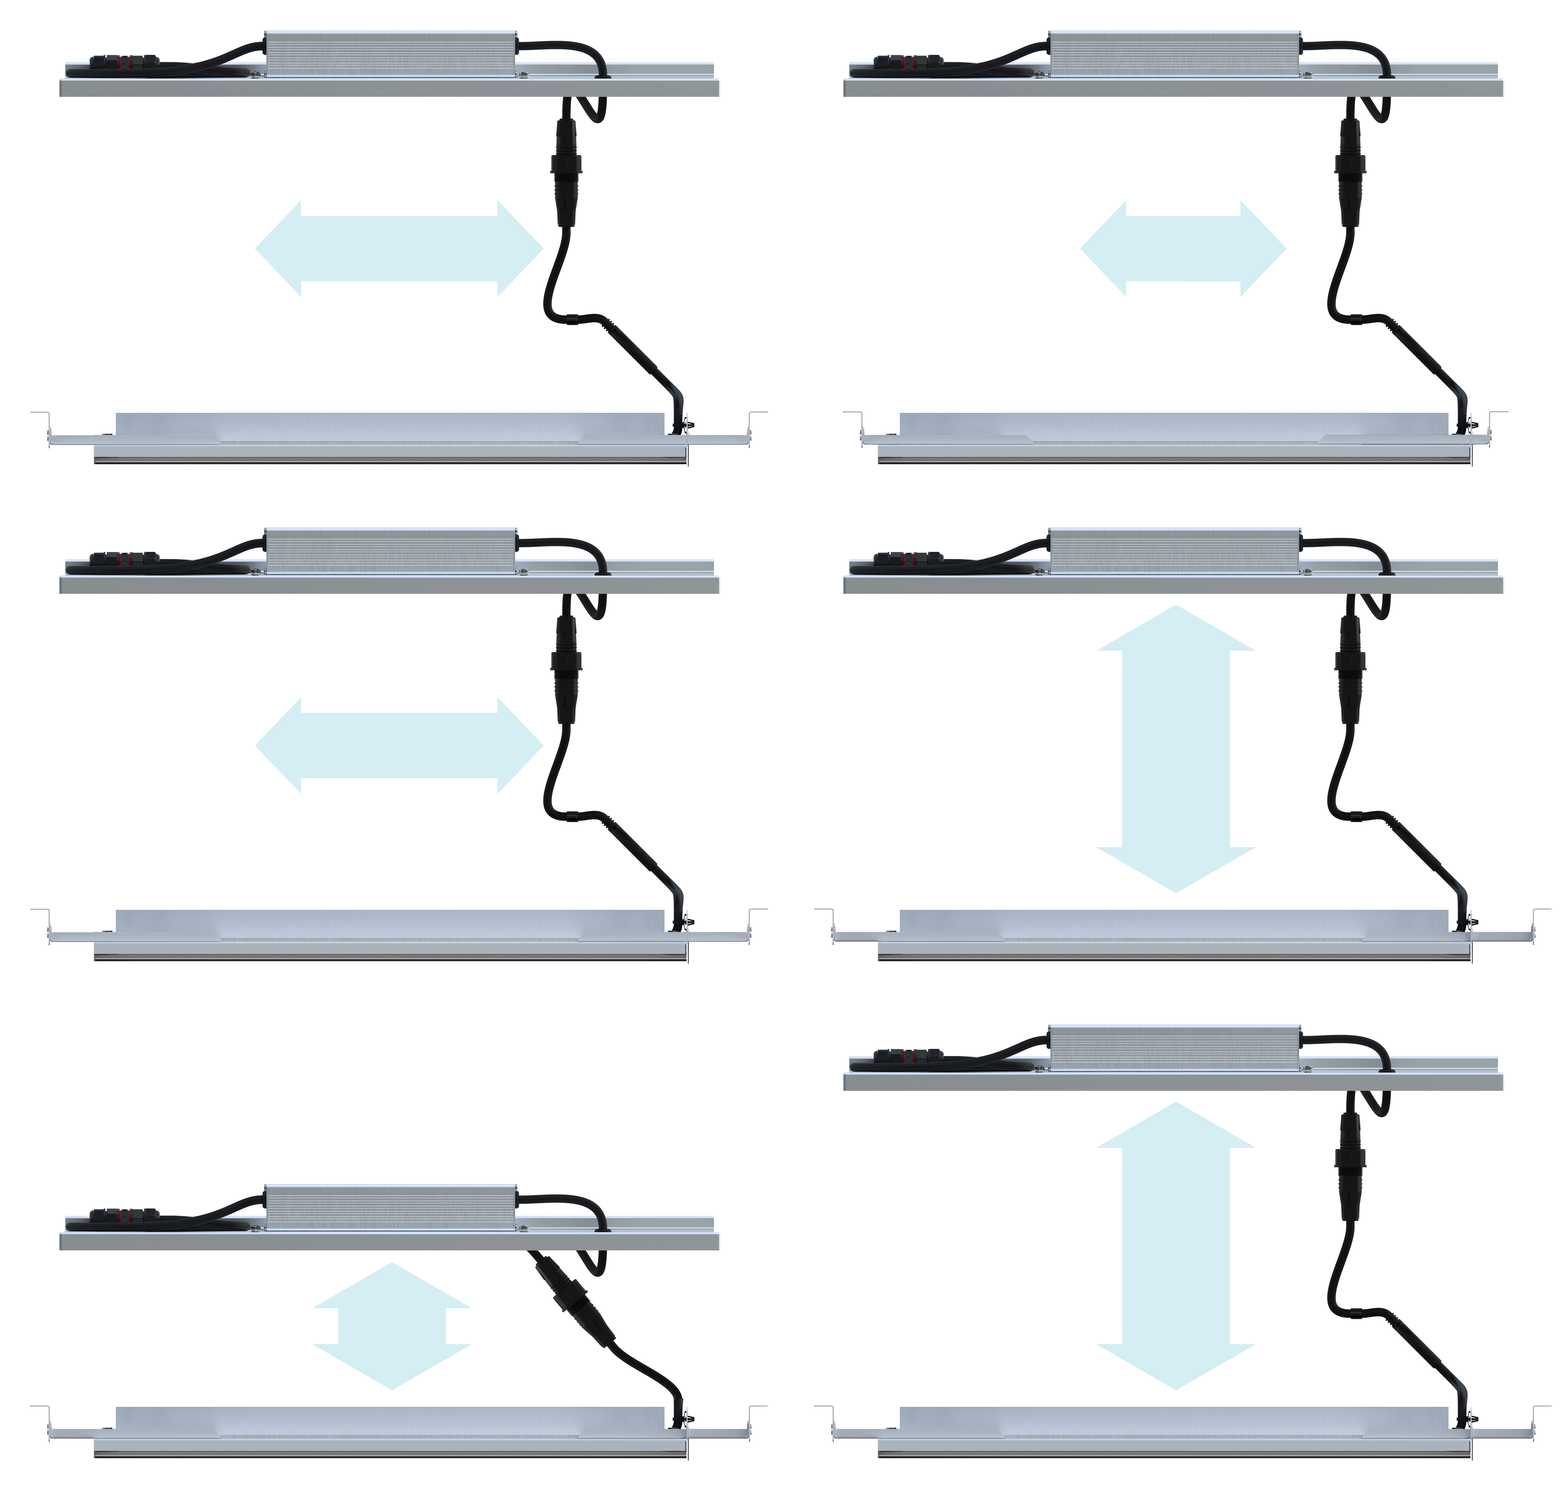
Light Plate VB is designed to adapt to the depth and overall dimensions of the existing enclosure.
The system comprises an adjustable LED light engine and a factory-sized vented lid with stainless steel insect mesh.
The lid is manufactured to suit the existing enclosure, retaining the original pyramidal lens while providing the ventilation required for reliable LED operation.

Simple Installation
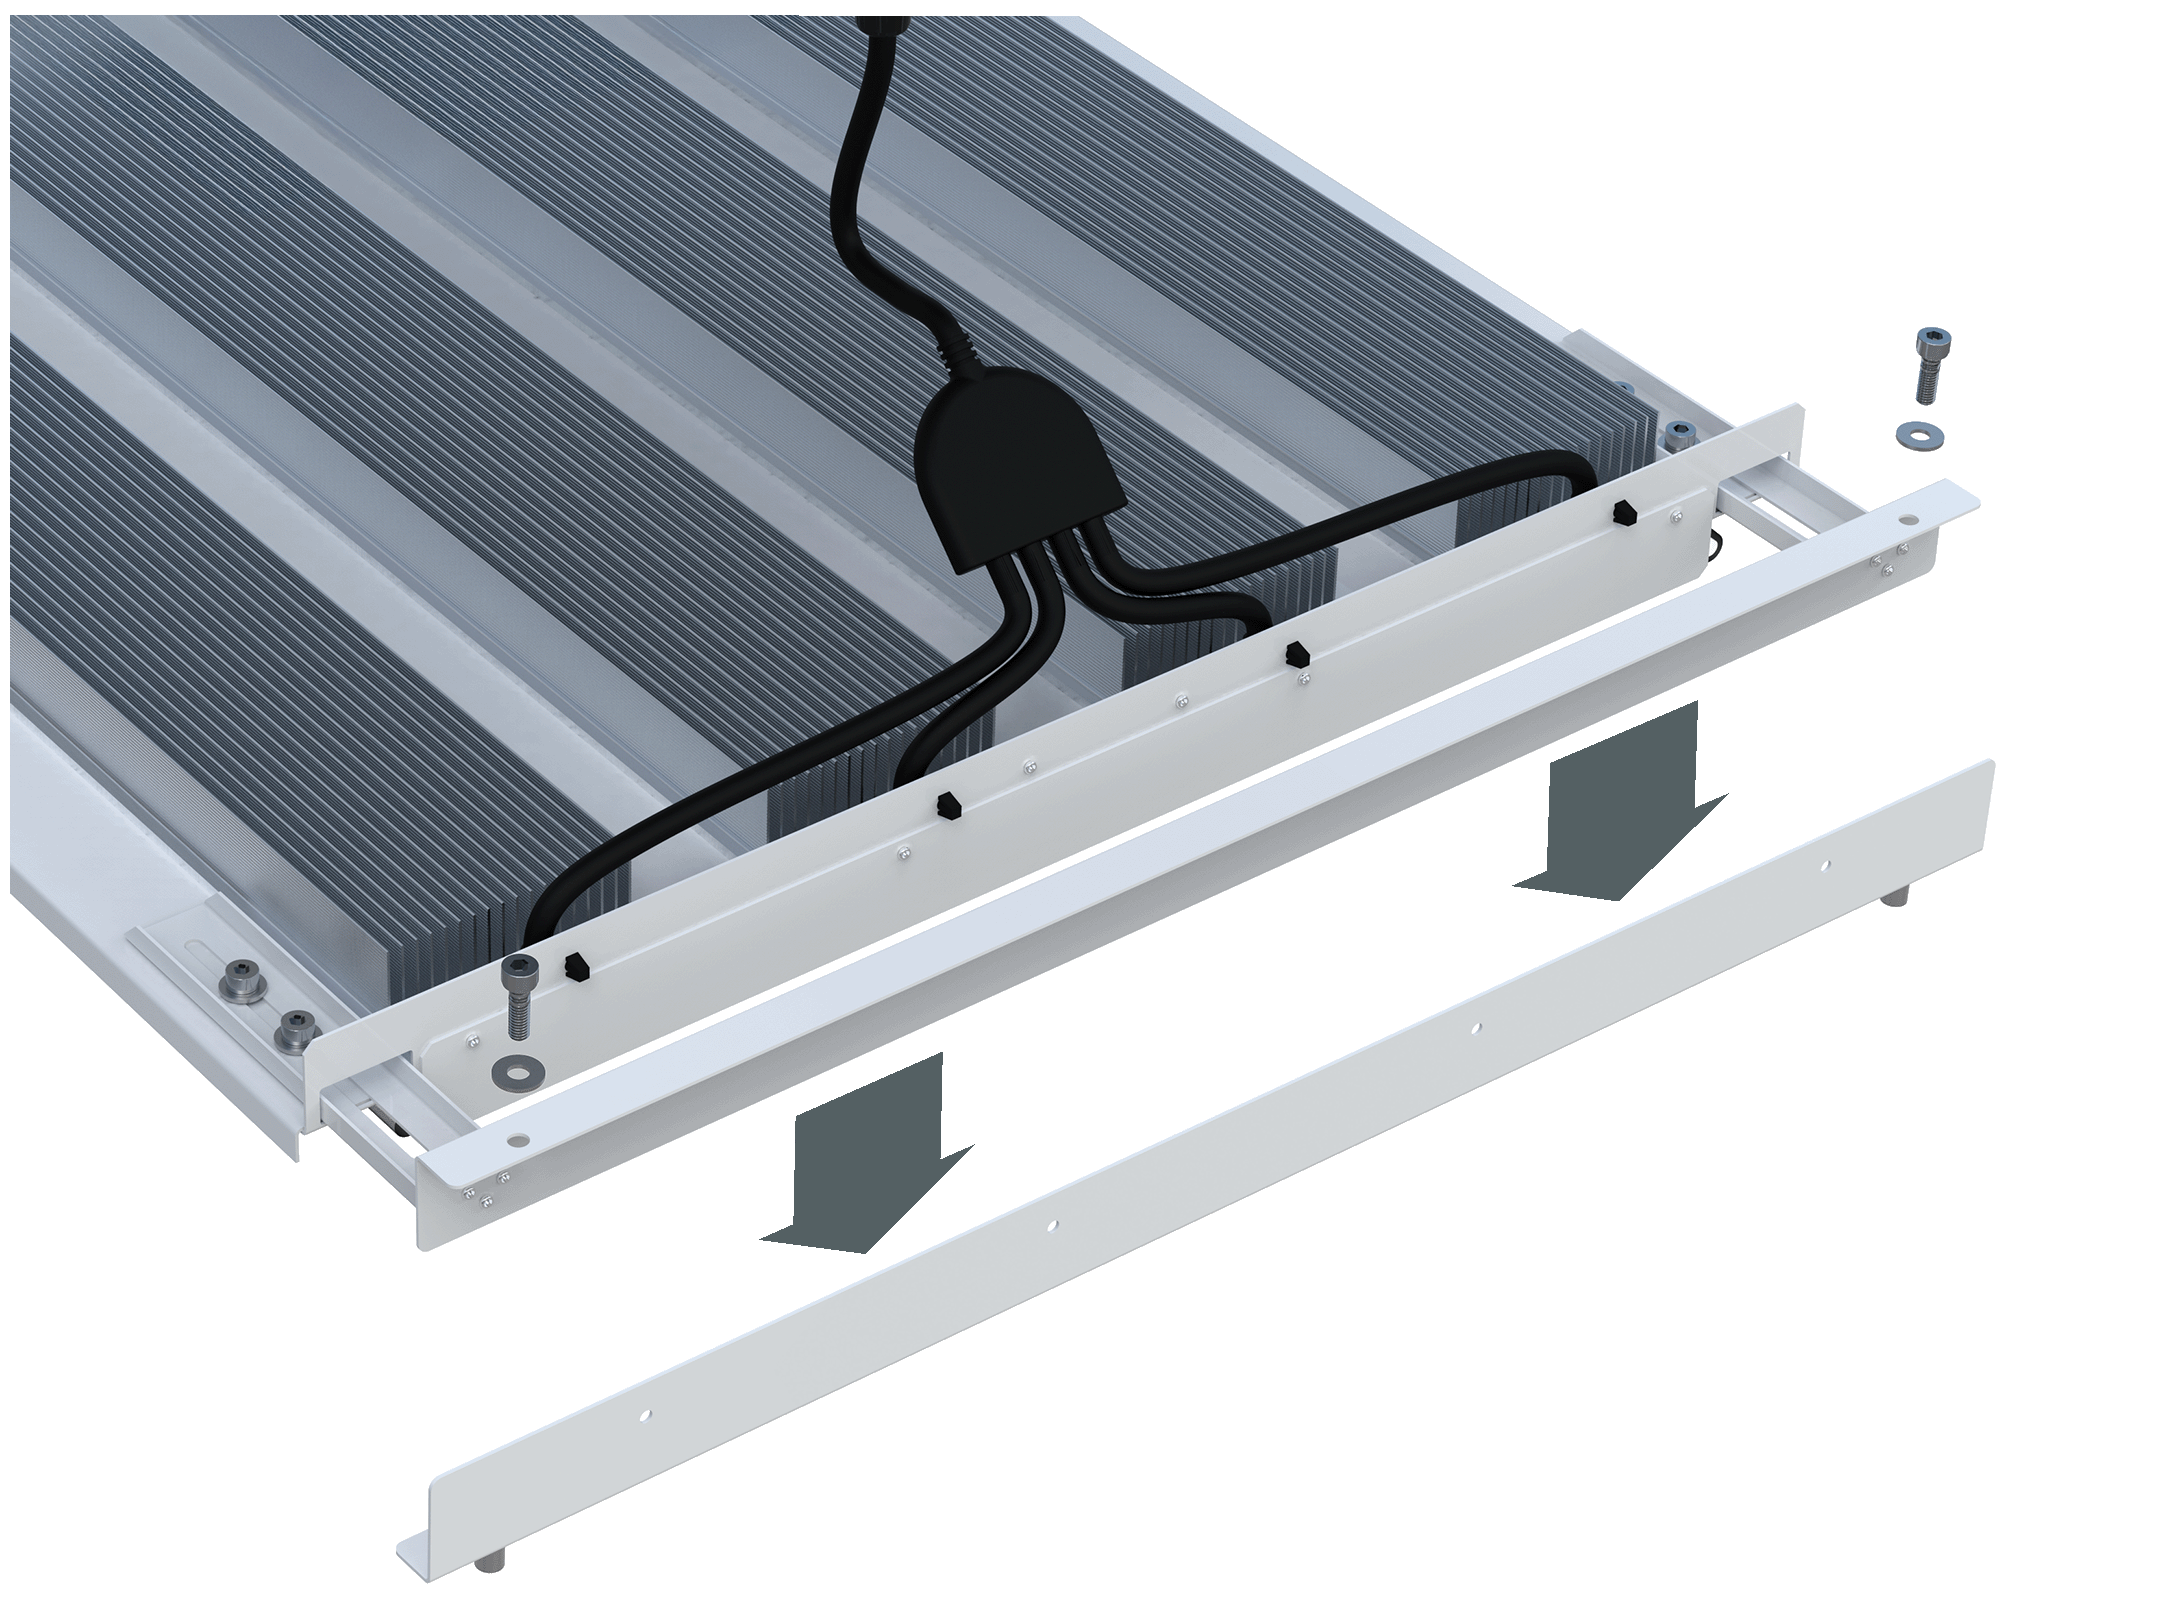
Once the original components are removed, the adjustable mounting brackets are riveted to the sides of the existing enclosure, positioned to suit the internal dimensions and secured using the supplied bolts.
The LED light engine is then connected using the quick connector, the vented lid positioned and secured, and the luminaire reconnected to power.
Powder-coated steel mounting brackets with retaining bolts provide positive mechanical restraint for seismic applications.

Three Power Options
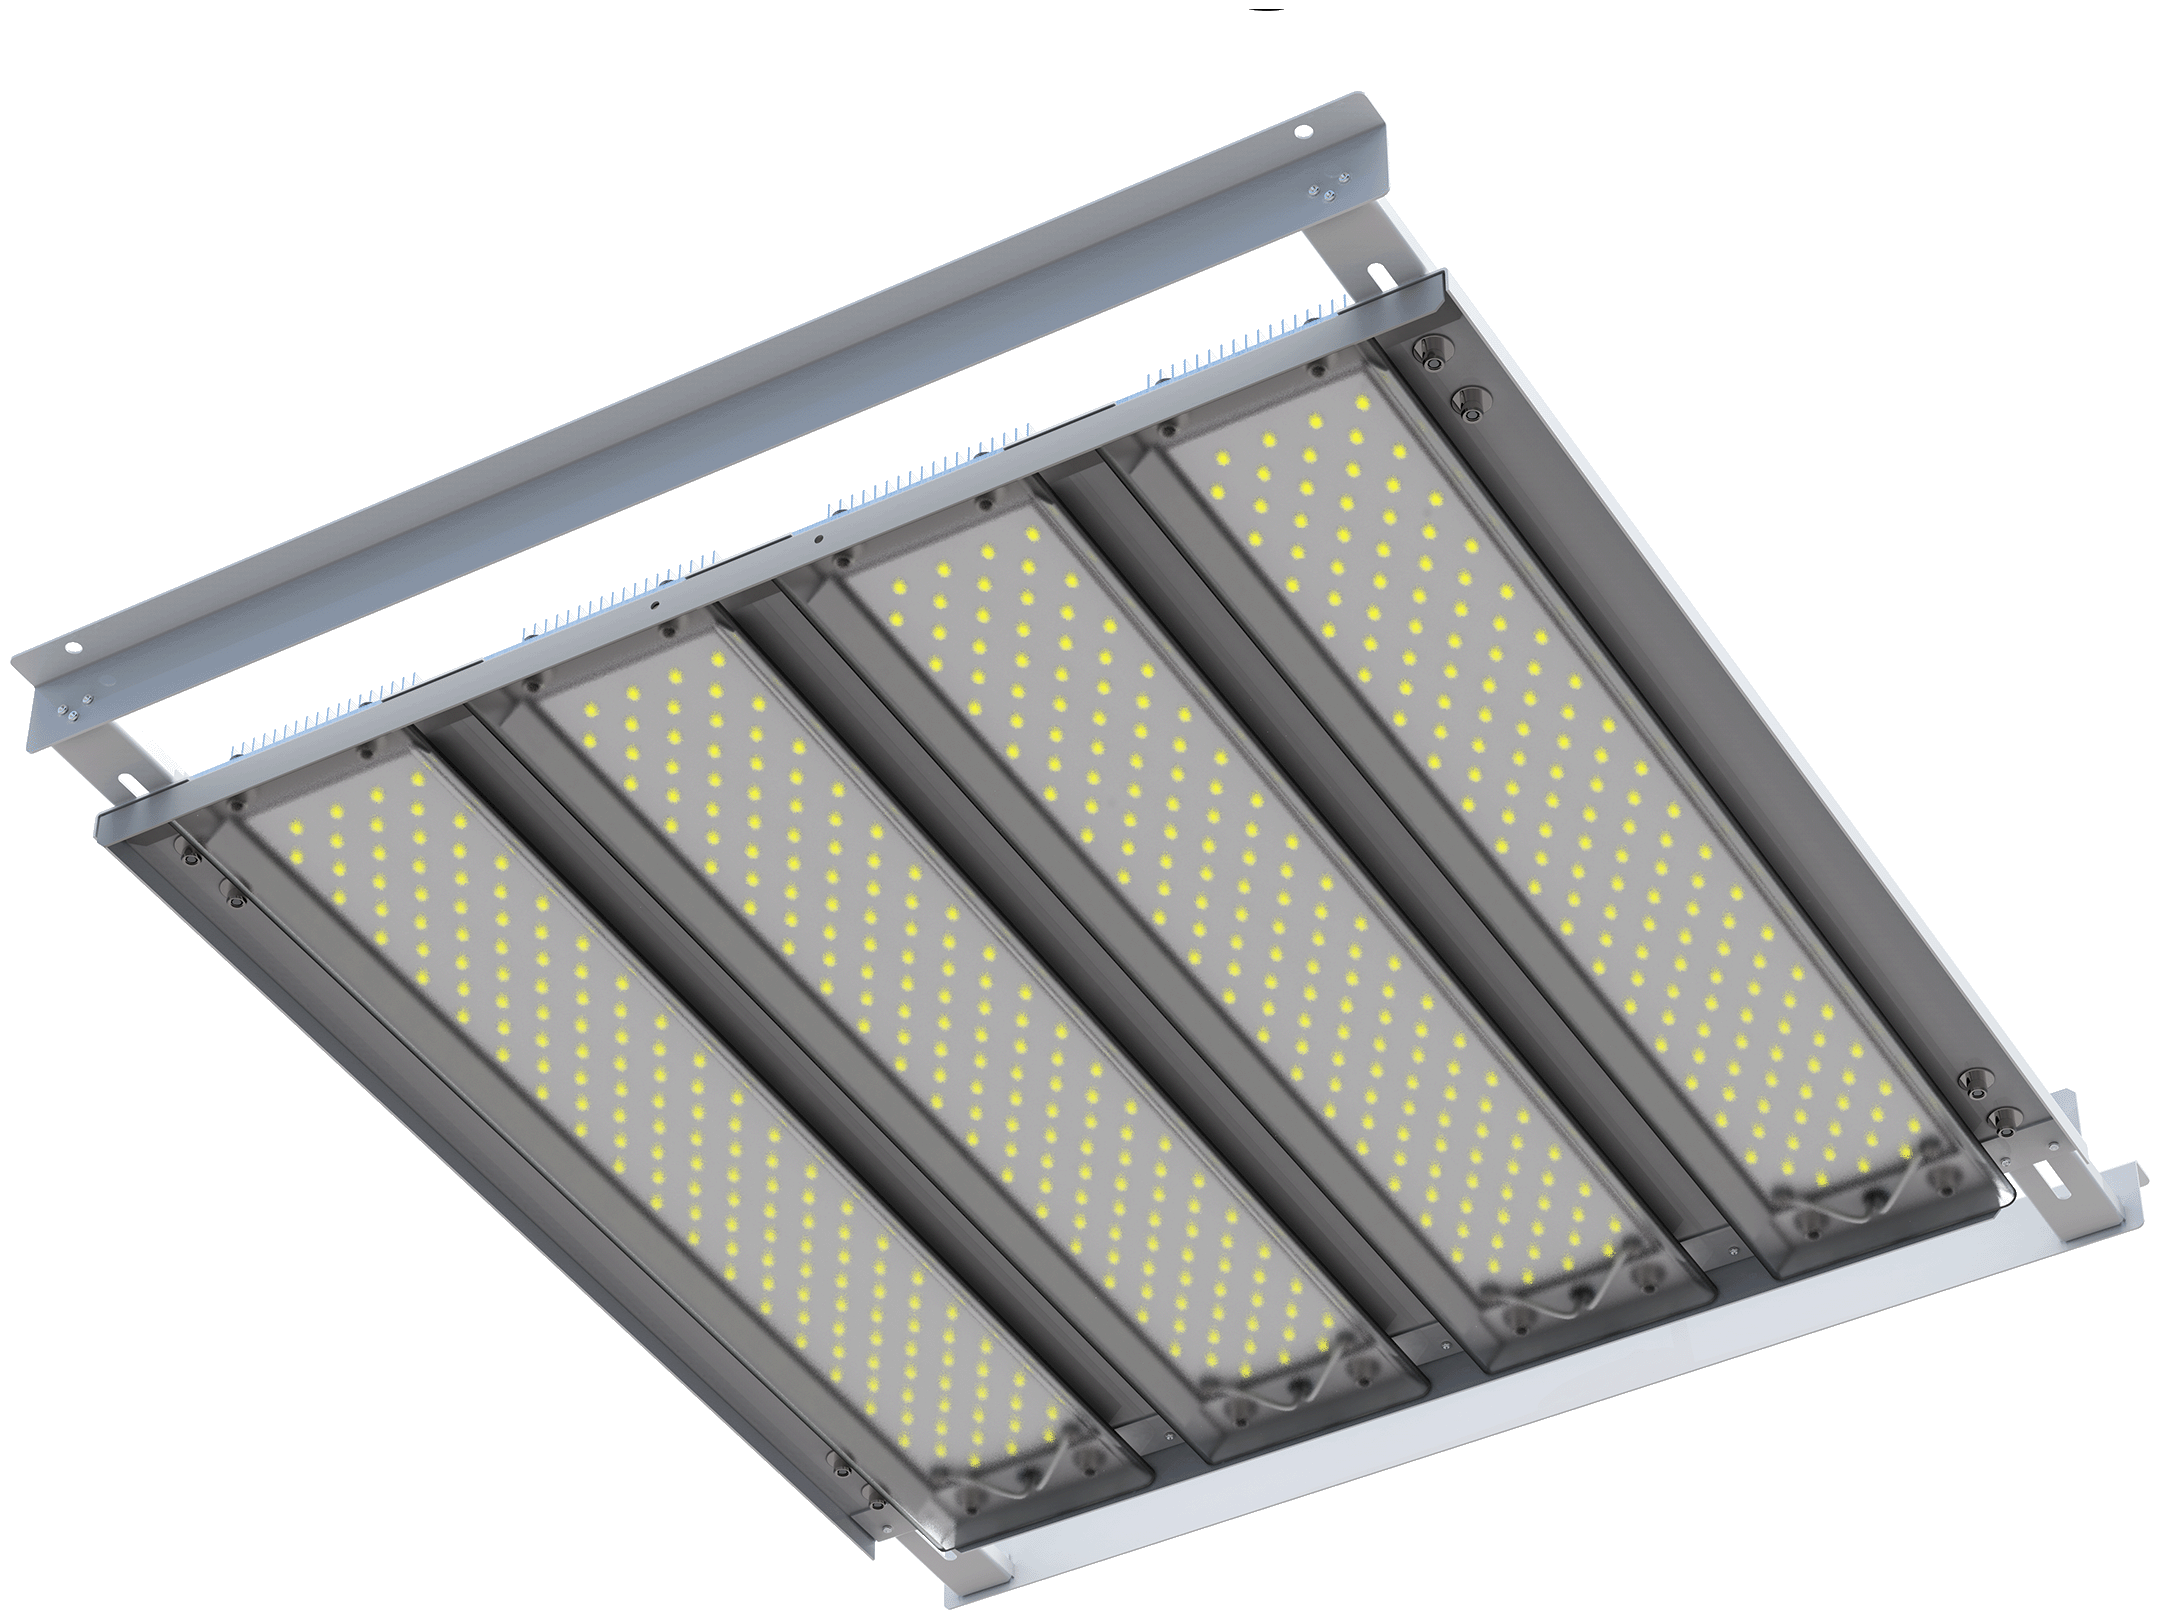
Light Plate VB uses the same heatsink and LED light-engine architecture as the current Soffito range, with three power options to suit the size, thermal capacity and optical limitations of the existing luminaire and lens.*
100 W | 17,000 lm
150 W | 25,500 lm
180 W | 30,600 lm
Note: The adjustable mounting system locks to the dimensions of the existing enclosure, positioning the LED light engine at the optimum height for the retained lens.

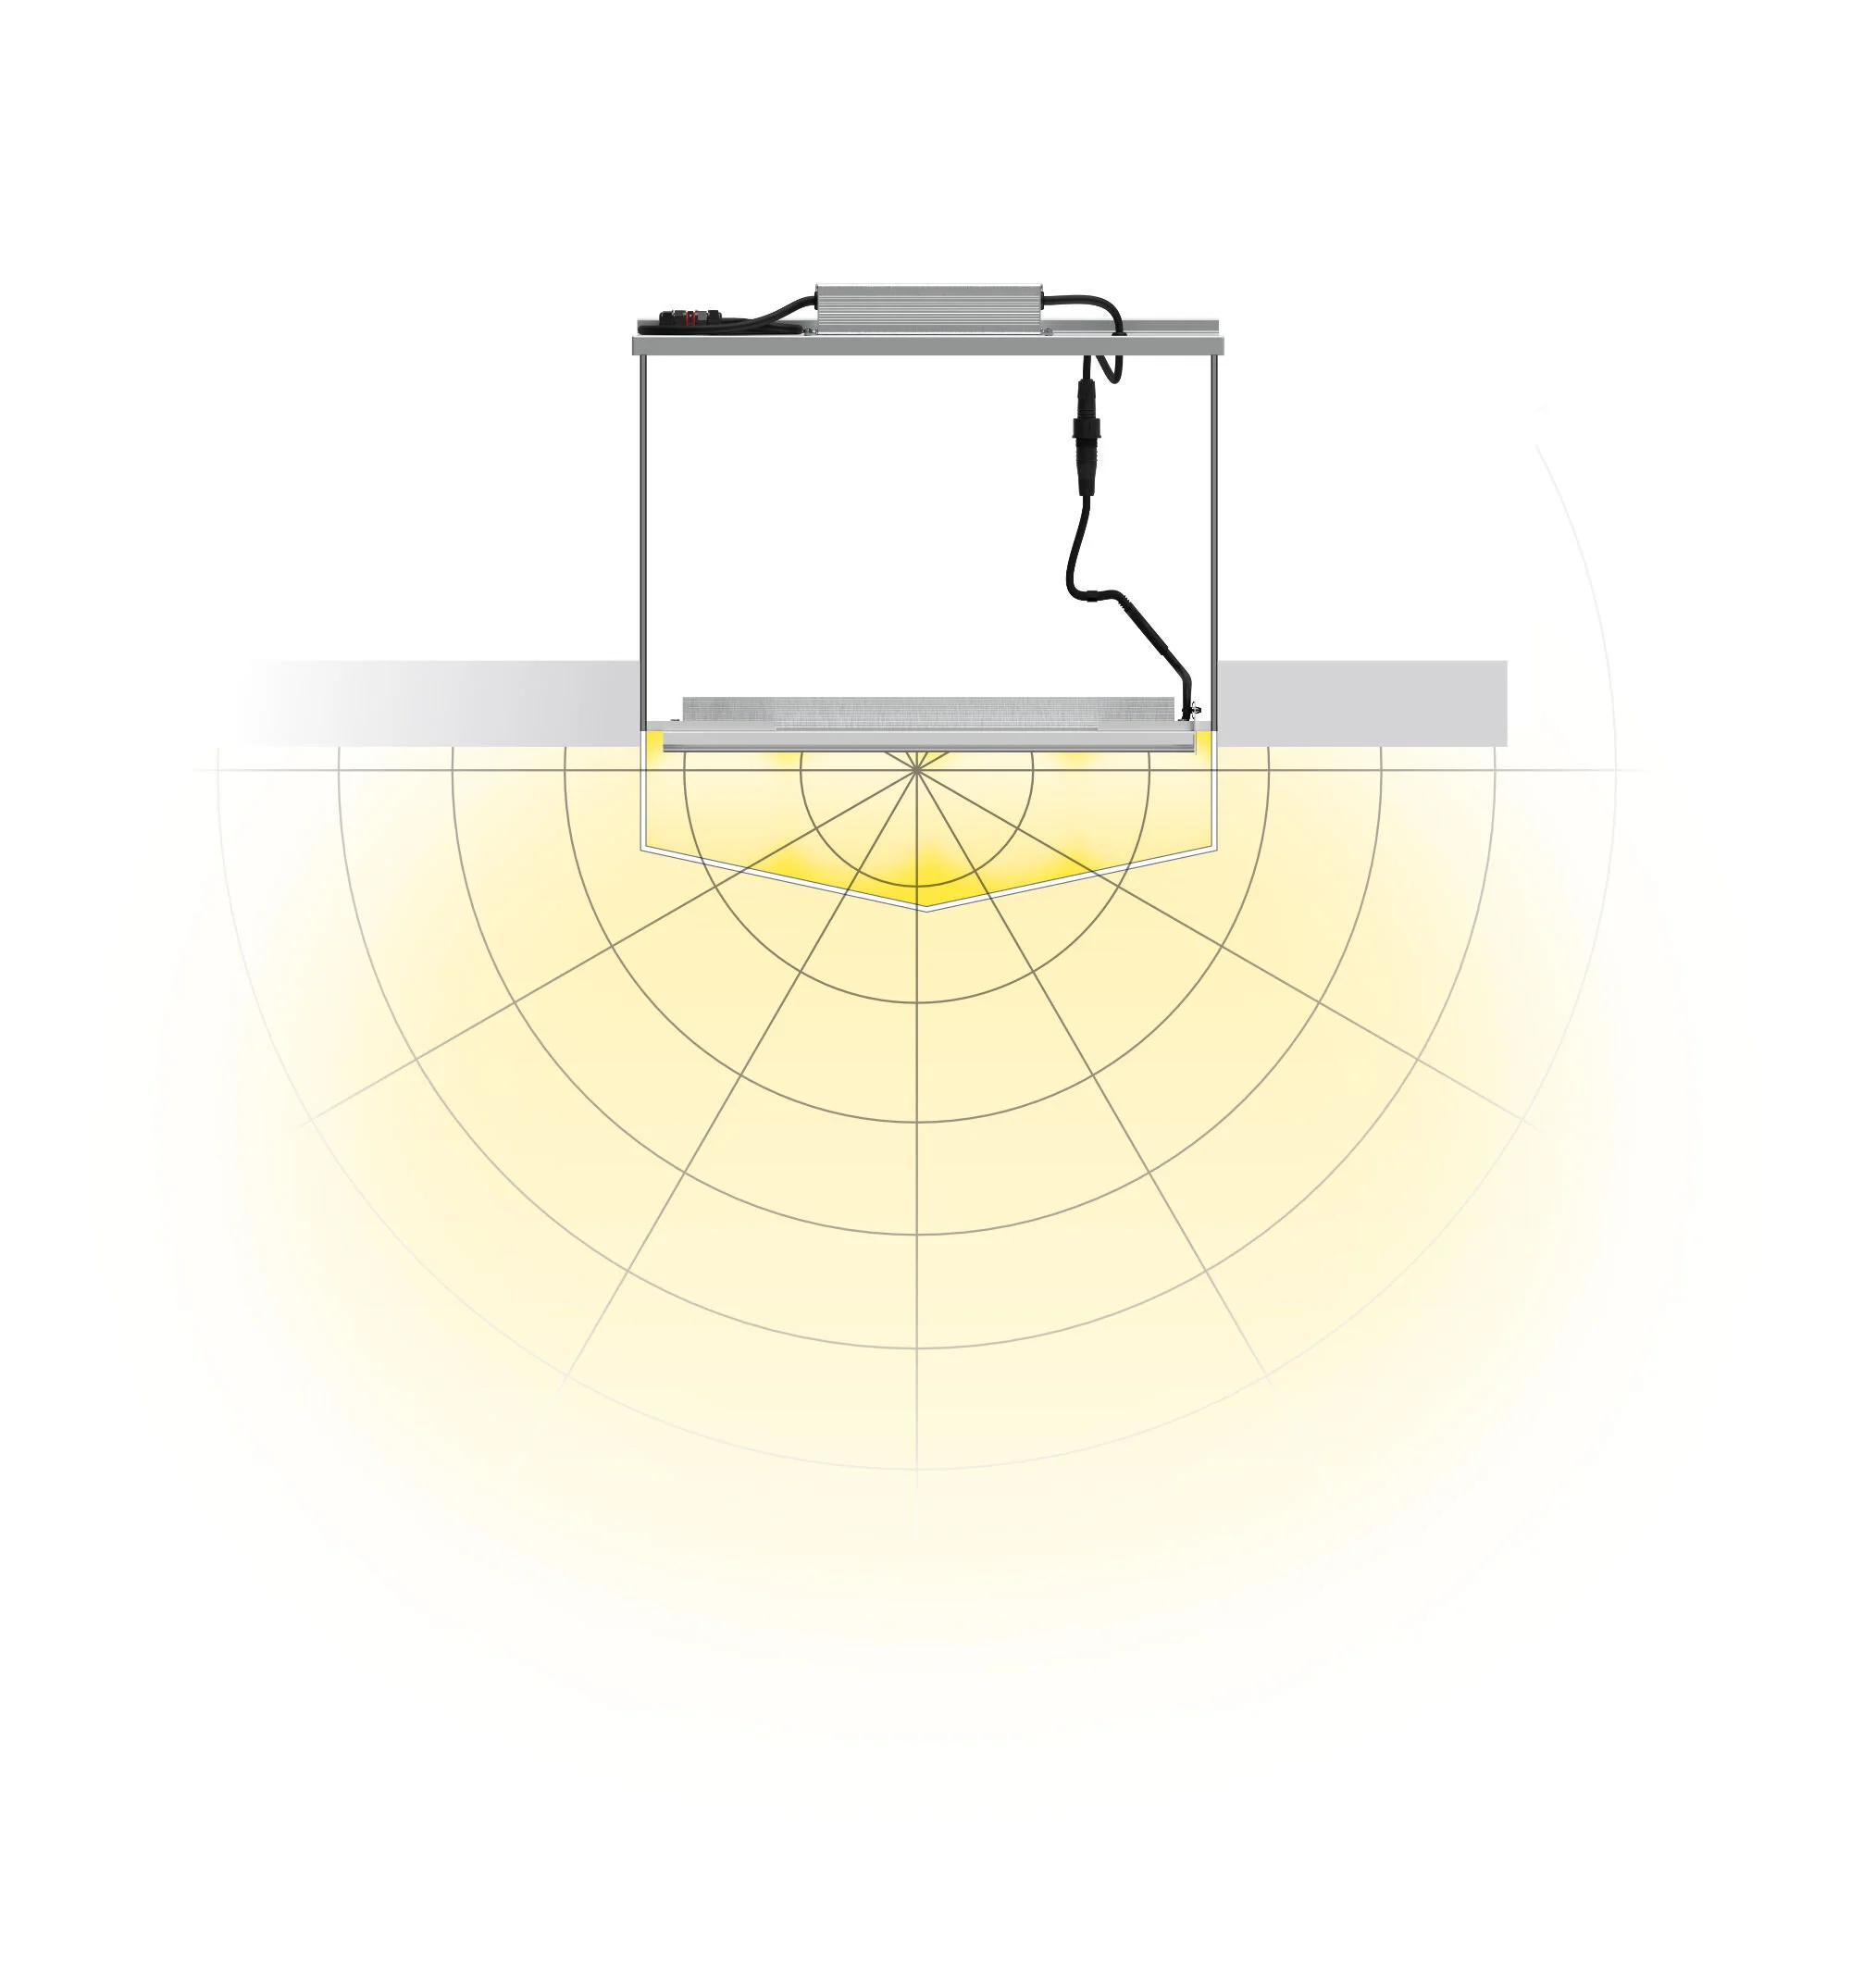
Primary Optics
The primary lens protects the LED array during installation while diffusing the individual light sources to reduce LED spotting, glare and reflections from stainless steel and other highly reflective surfaces.
The broad, diffuse distribution improves visual comfort and helps deliver light around machinery and overhead services, supporting inspection, production and sanitation tasks throughout food-processing environments.
Reduces LED spotting, glare and reflections
Broad, diffuse light distribution
Reduces harsh shadowing around machinery and overhead services
High colour rendering supports visual acuity
Improves visibility during inspection and sanitation

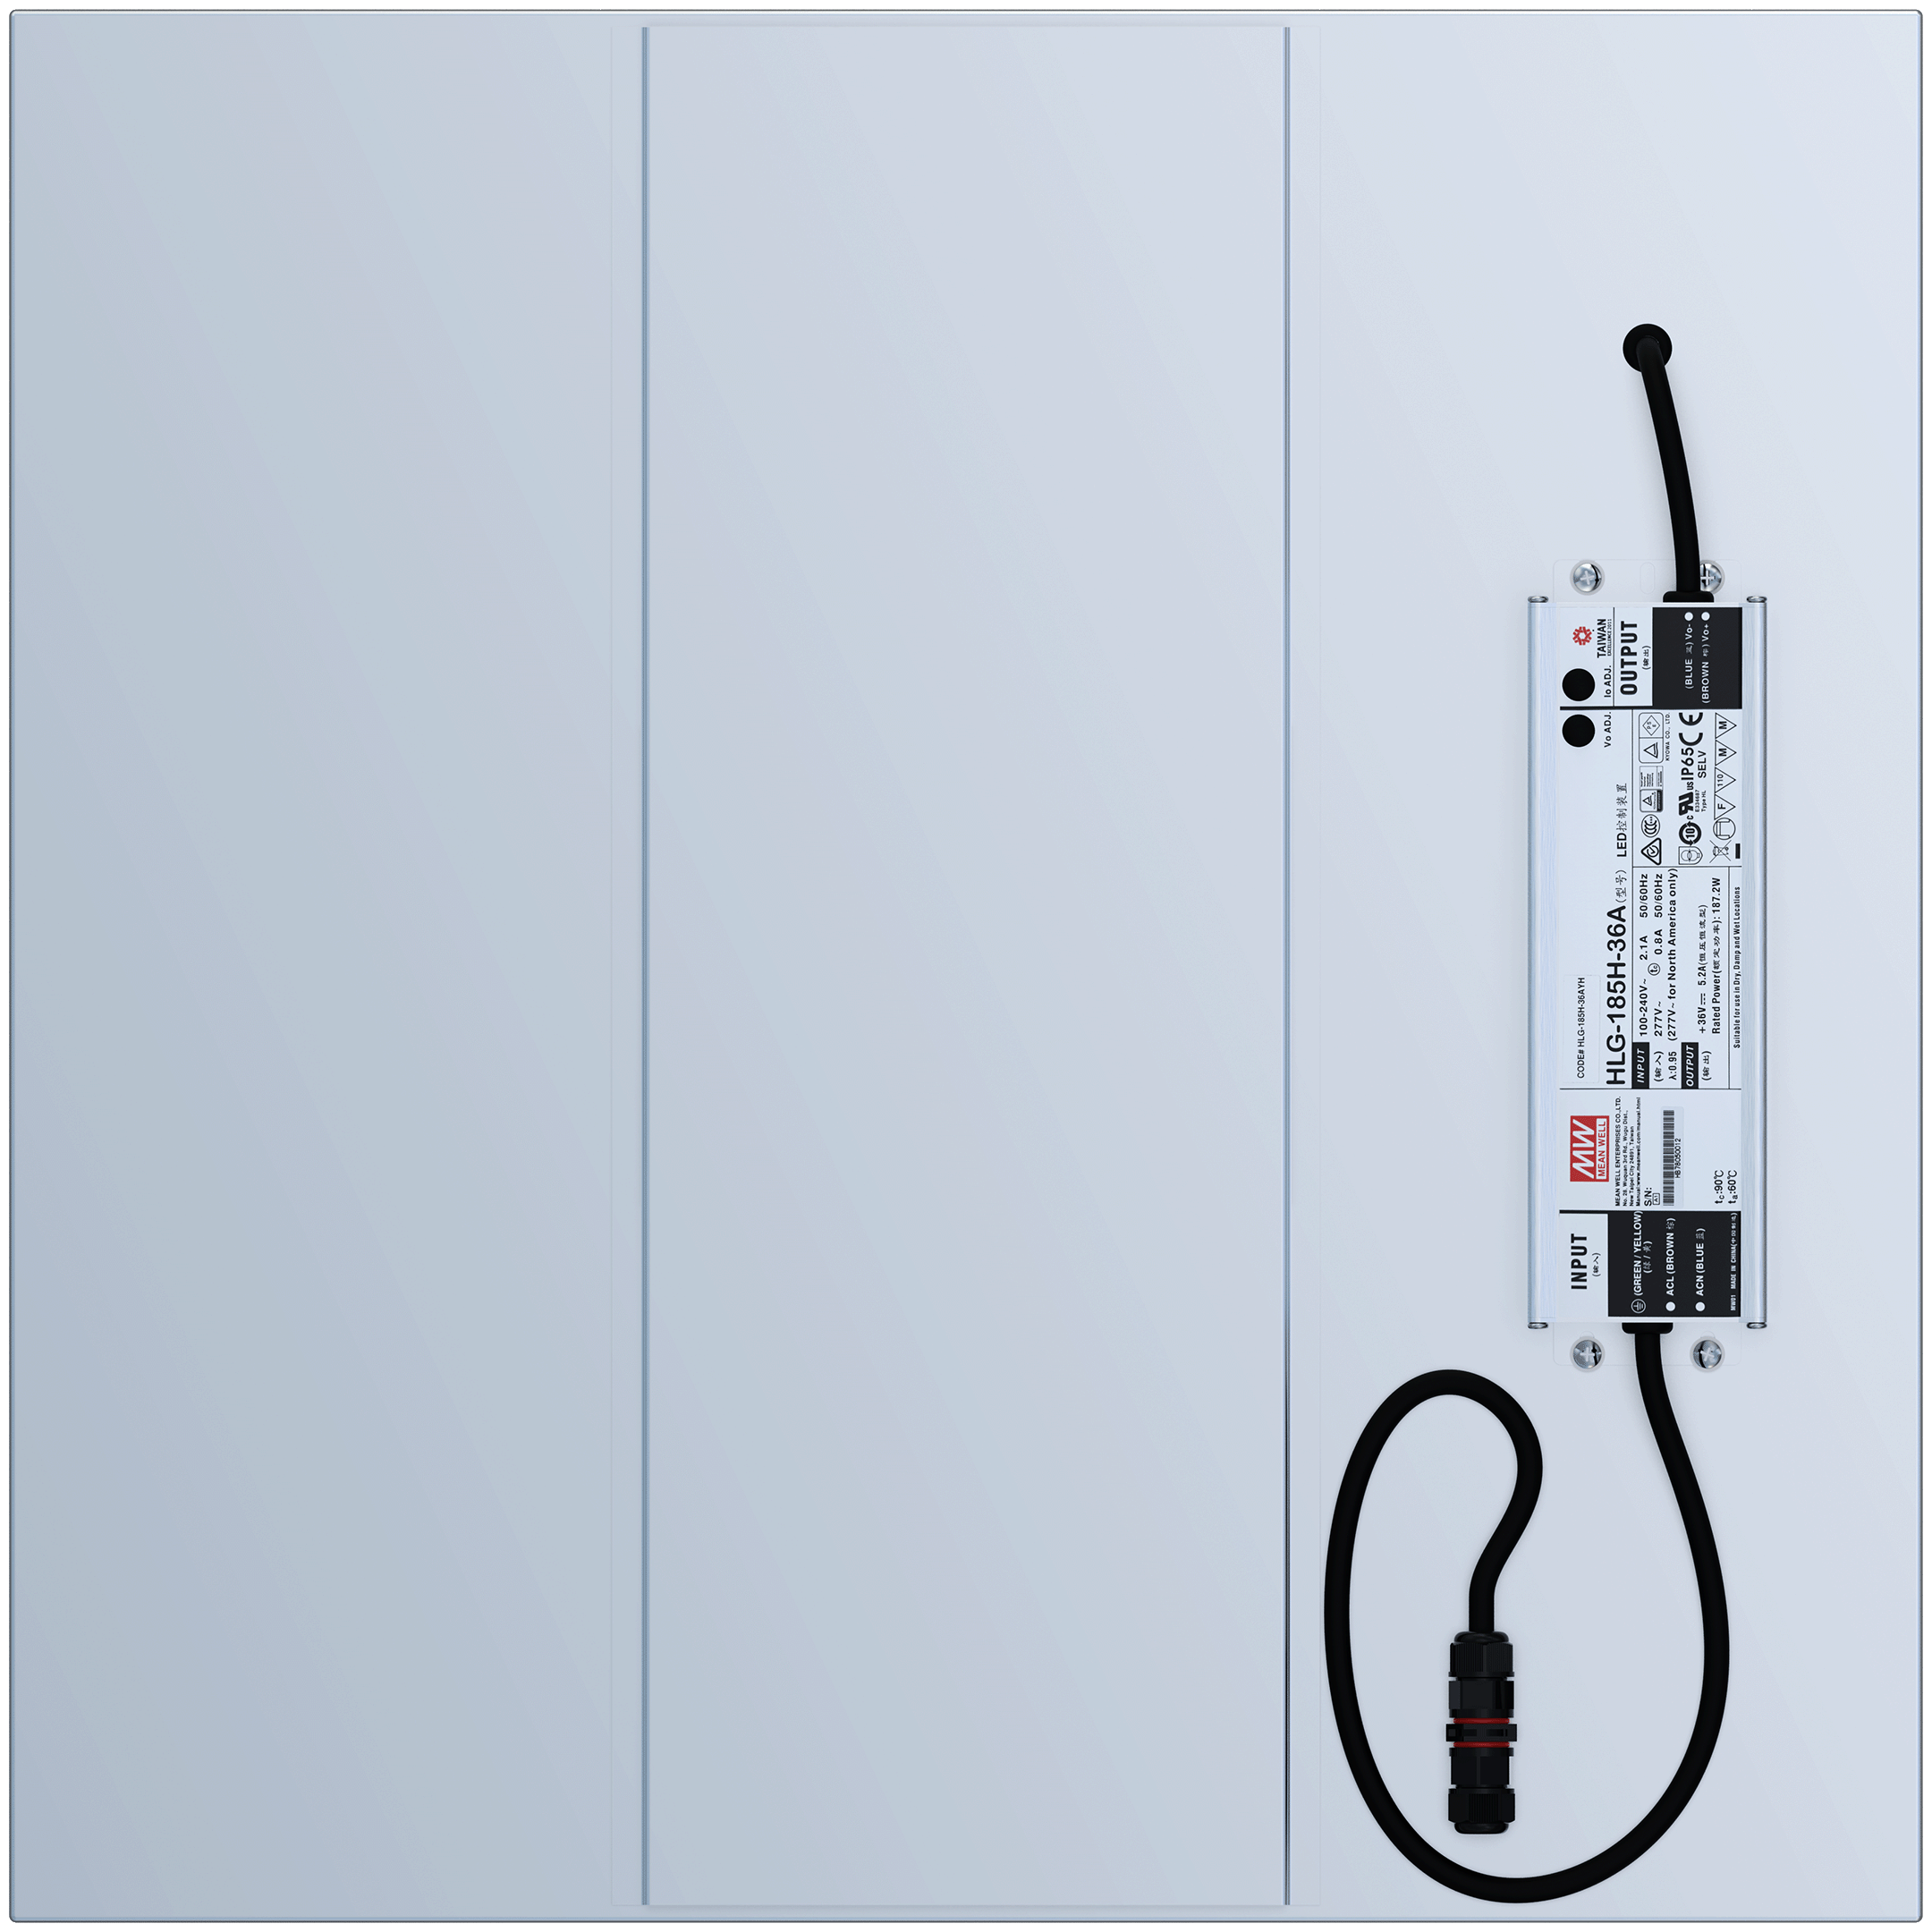
Custom Lid Direct from Factory
Most 200–450 W metal-halide pyramidal-lens luminaires use square or rectangular enclosures. Simply provide the external dimensions of the existing fitting and Isollux will manufacture the vented lid to suit.
Odd-Shaped Enclosure?
For unusual enclosure shapes, send us a photograph and dimensions. Options include standard Light Plate lid or a custom vented solution designed to suit the existing luminaire.

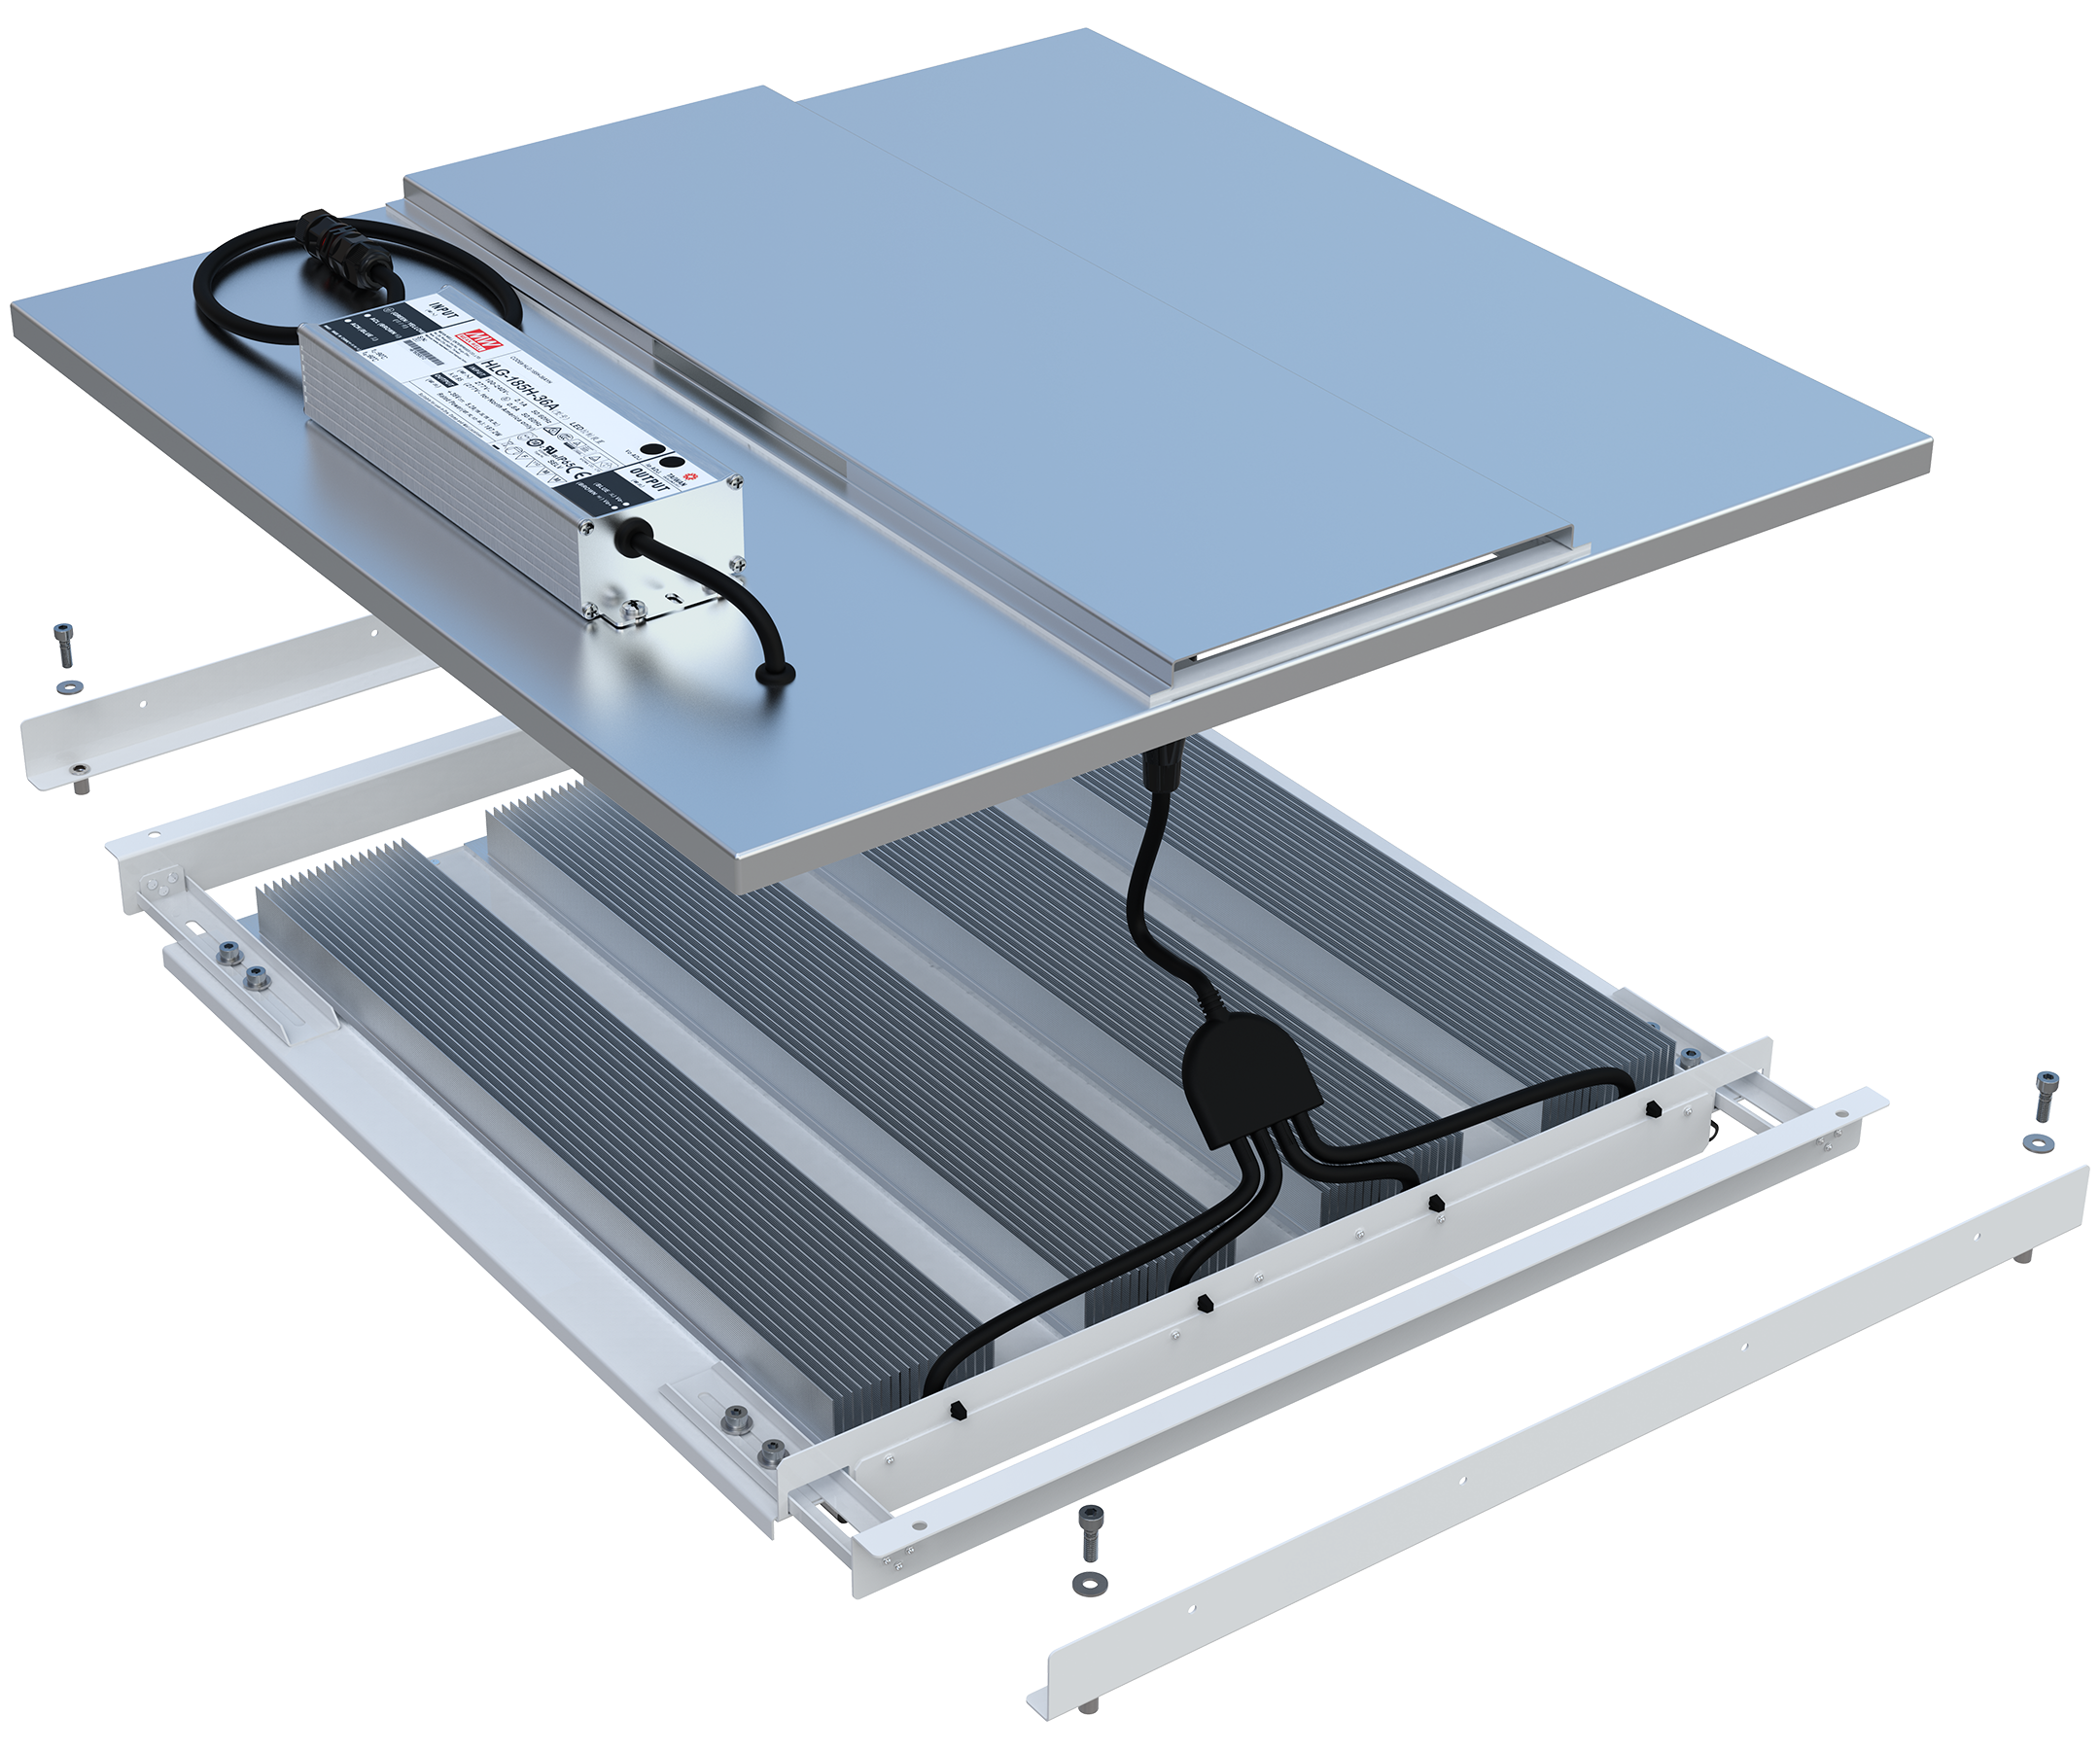
Key Benefits
External LED driver reduces heat within the luminaire and supports long-term service life.
Quick-connect design simplifies installation and future maintenance.
Vented lid promotes natural convection to reduce thermal stress on the LED system.
Stainless steel insect mesh protects the ventilated enclosure.
Factory-manufactured lid sized to suit the existing luminaire.
Food-grade, shatter-resistant primary lens reduces glare and LED spotting.
Broad, diffuse distribution improves visual comfort and uniformity.
Isollux XE high-density dual-die LED arrays, conservatively operated for long-term performance.
Coated LED PCBs provide additional protection against moisture and chemical exposure.

Simple Retrofit Installation
Light Plate VB is designed to fit inside existing pyramidal-lens luminaire enclosures using an adjustable mounting system and factory-sized vented lid.
Check Before Ordering
Measure the external width and length of the existing enclosure and confirm the available internal depth.
For unusual enclosure shapes, send Isollux a photograph and dimensions so we can confirm the appropriate mounting and lid configuration.
Installation
Remove the existing lamp, ballast and internal components.
Remove any redundant brackets and sharp edges.
Fit the adjustable Light Plate mounting brackets.
Position the LED tray at the required height and secure.
Connect the LED driver and quick connector.
Fit and secure the factory-sized vented lid.
Reconnect the luminaire to power and test.
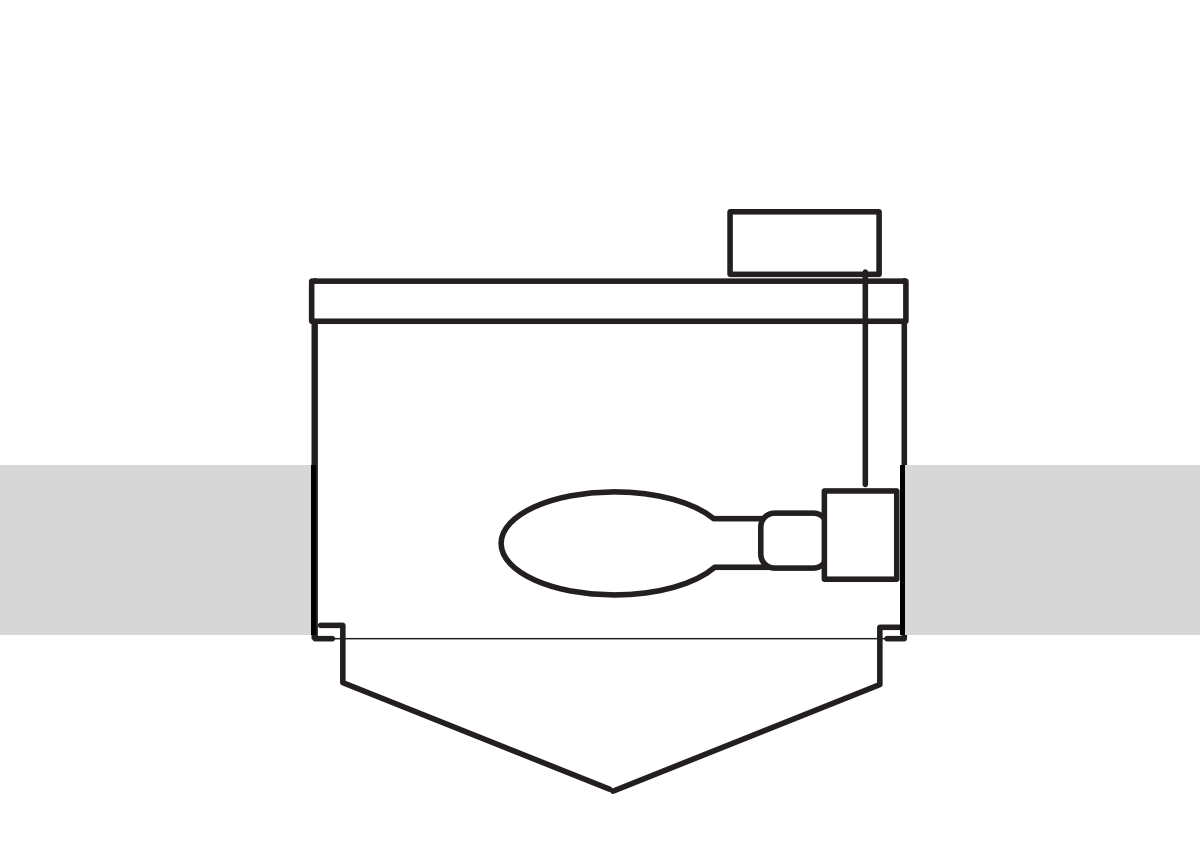
1. Permanently disconnect and isolate electrical components prior to stripping the enclosure
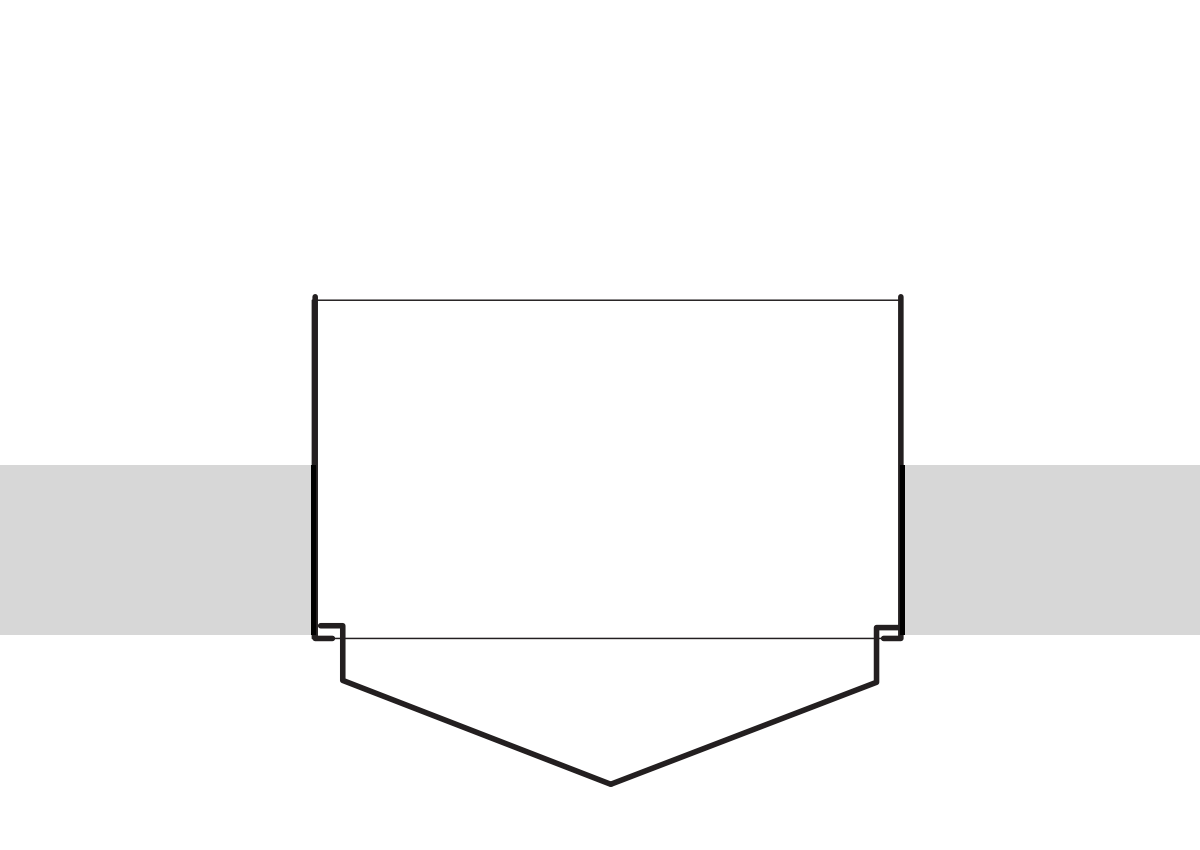
2. Visually check the stripped enclosure and original lens for damage
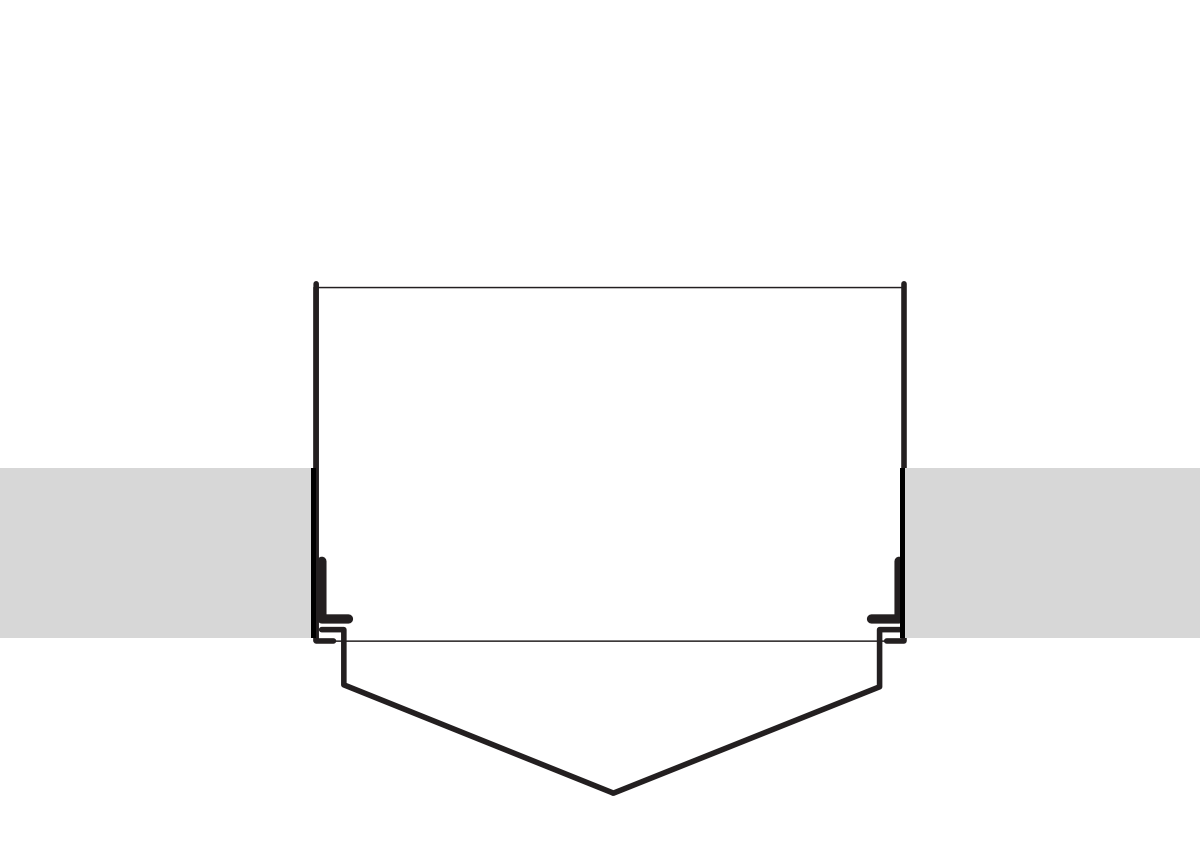
3. Fix brackets provided at equal heights on either side. For best results, LED should be at or below the level of the opening when installed (subject to lens shape).
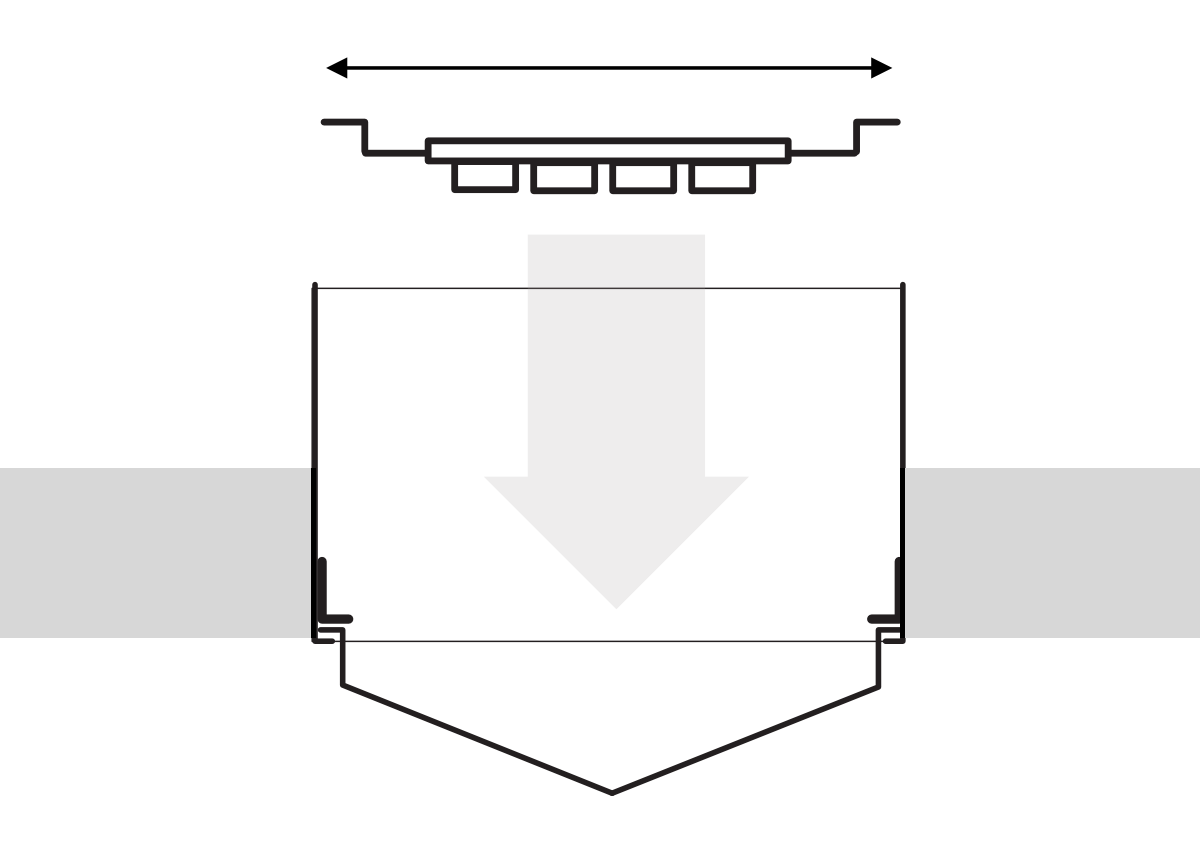
4. Adjust width of arms to provide a suitable footprint onto the brackets approximately 4mm inside the overall width of the enclosure and lower into position
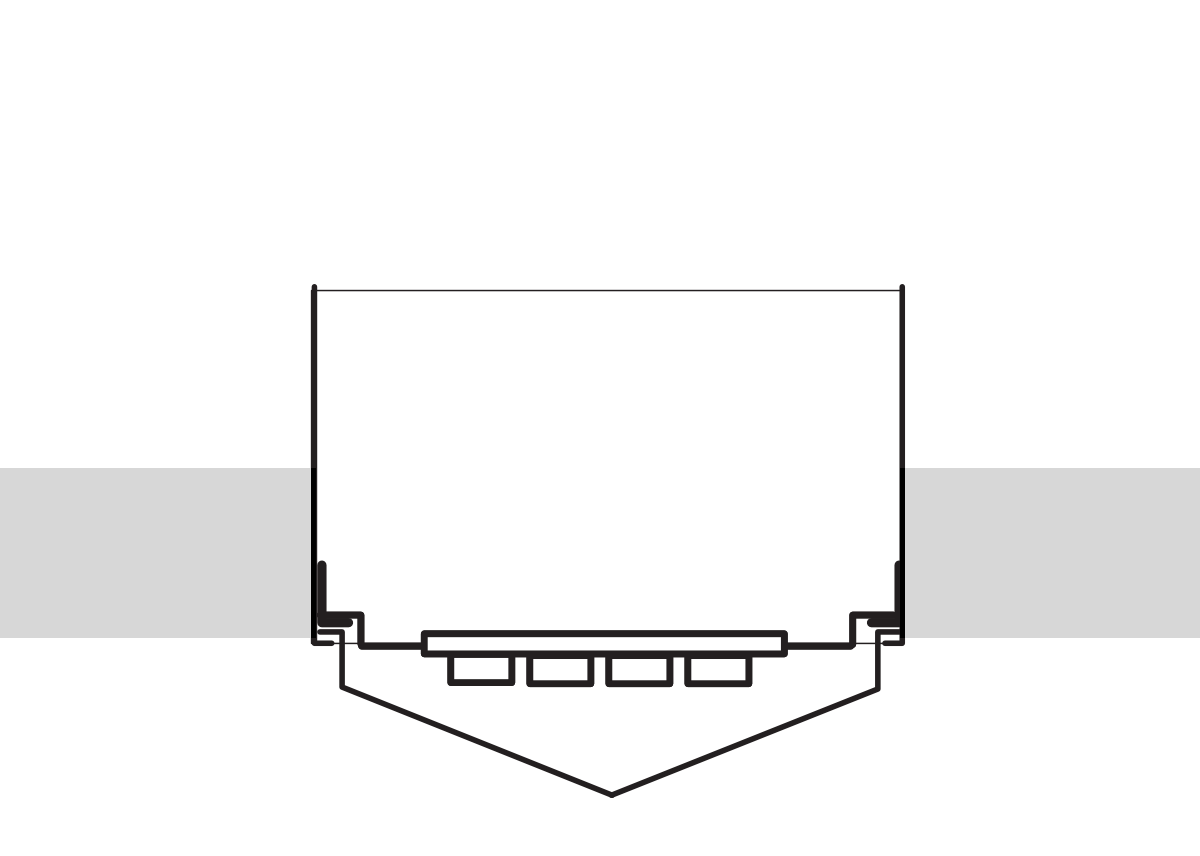
5. Lock the Light Plate to the brackets at each corner using the screws provided for seismic restraint.
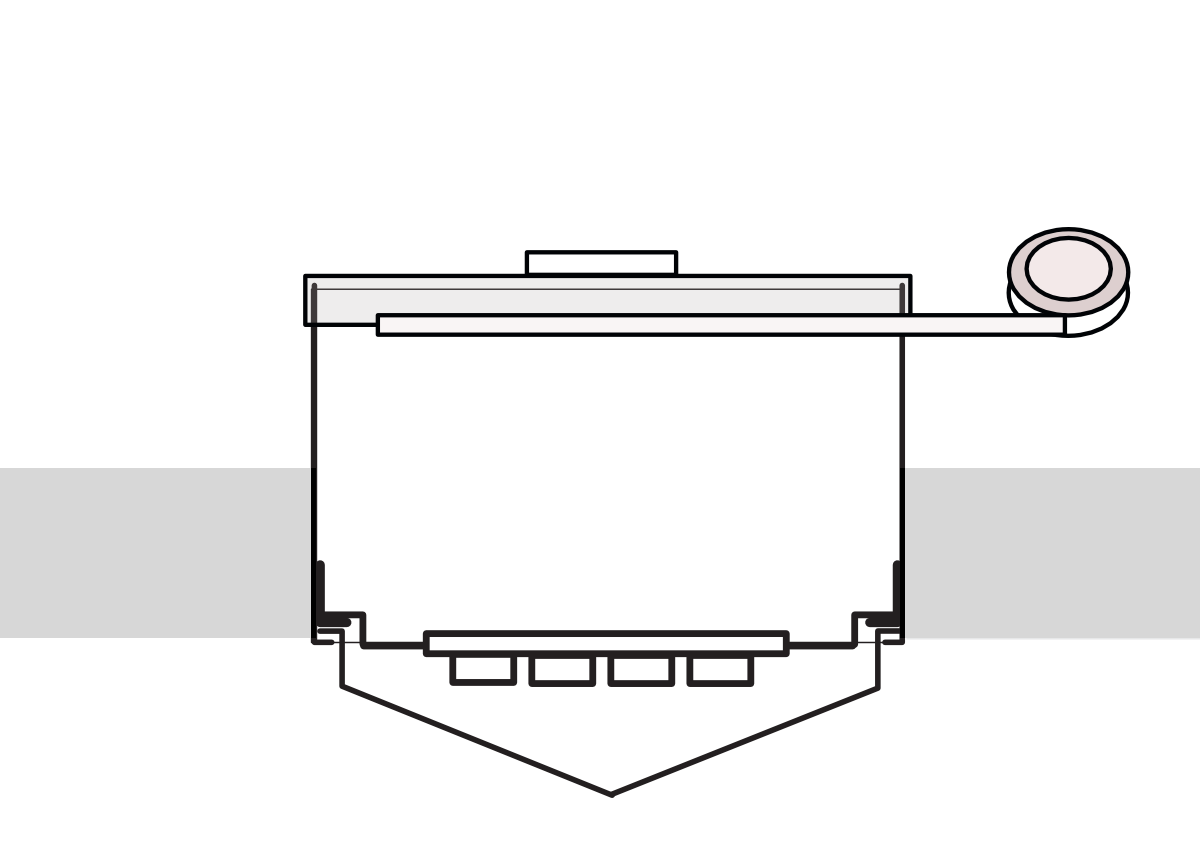
6. Cover with lid provided ensuring the length of the vent runs parallel with the lens and heat sink below. Connect and test before taping lid to enclosure to seal.